Singer Hand Crank Custom
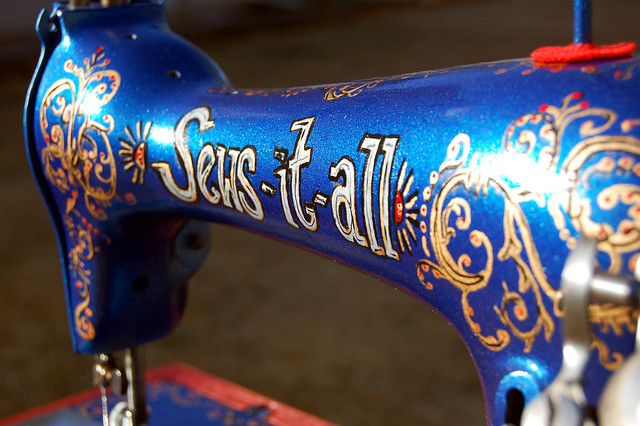
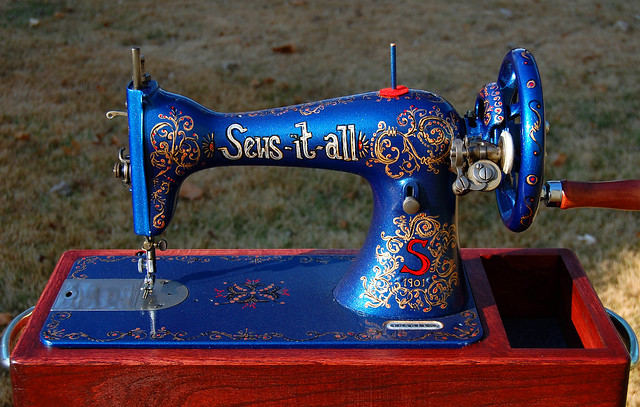
The Sews-it-all sew anywhere machine is finally finished!
I started this project over 6 years ago! This old 110 year old Singer had been left for dead and destined for the scrap heap after being discarded by the side of the road. When I took it in, the inner workings had rusted together from years of neglect, and the finish was bubbled, chipped, and totally destroyed.
With the help of Mr. Fixes-it-all, we took it apart, soaked it, stripped it, cleaned it, and oiled it so that it once again sewed. Then we did some body work, sanded it, added primer, sanded some more, added layers of paint, and then I finished it off with some detail painting of my own. The hardwood base is newly made, stained a deep red and finished with a durable clear coat.
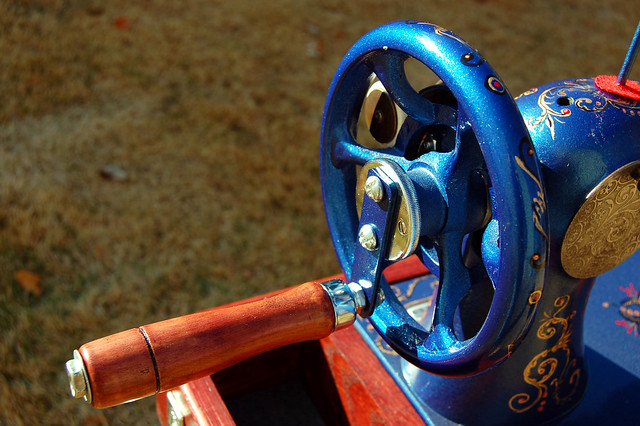
This Singer 15-30 was originally a treadle machine. Since I already have three other treadle machines (that I never use) I decided that this needed to be transformed into a people-powered hand crank. Unfortunately, this Singer was not manufactured with a hole to accept a motor mount, which means that I don't have the option of attaching one of the new aftermarket hand-crank adapters. So, we got creative and made one from scratch. We took an extra clutch nut and threaded it to accept two screws holding on a piece of flat-stock steele with a handle at one end. To get around the problem of turning the handle in the same direction that the clutch nut turns to loosen for winding a bobbin, we added one extra washer between the clutch nut and the original washer, and that allows me to tighten it enough that I can crank and sew away without spinning out the clutch.
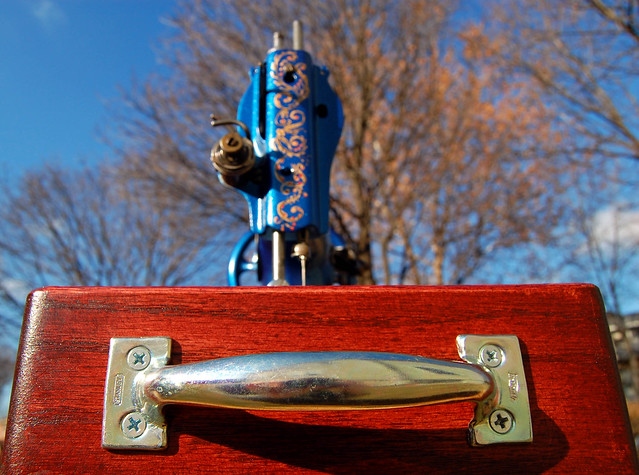
The other out of the ordinary modification we made was adding a handle on each side of the wooden base. I plan on carrying this out and about with me, and believe you me, these make it much easier to lug around than trying to grab the bottom of the base.
Oh, but the real test is how it sews, right? I just threaded this baby up, and did it CORRECTLY after taking this photo (I missed the spring on the side of the tension disks below the take up lever). In this machine the needle is set in "sideways" facing the left side.
Not bad for an old timer! Sews great! The only drawback is since the hand crank is attached directly to the machine, it takes one full turn to make one stitch. Which turns out to be a lot of turning to sew a seam! I finished this little holiday pocket tissue holder in just a few minutes, but I sure didn't want to turn the crank any more when I was done.
My plans for the Sews-it-all sew anywhere machine are to take it with me for events where electricity isn't available. It will be perfect for making fabric flowers from strips (plus I have a ruffler attachment for this machine, woo-hoo!), or sewing up a seam or two for any little craft project.
Phew! One project done, now on to the next one!





Comments
~Nat
My hand-cranks are back-ups for when the power is out.
I just discovered your blog through Pinterest and I'm so glad I did!
Cathy ♥
It worked, but the biggest issue was how slow it stitched in this way, since every one turn of the hand crank only created one stitch. The other hand cranks I have create something like 3 stitches for every turn of the crank, and sew more efficiently.
Best of luck to you! - Erika
Cristina S.