Tuesday, December 27, 2011

Pinning

Photo from Wee Wonderfuls post, "shrinky dink pins"

Have you seen these handmade pinheads from shrink plastic like these DIY Designer Pin Heads and these shrinky dink pins from Wee Wonderfuls? Yeah, totally awesome! I got a package of shrink plastic in my Christmas stocking this year and spent all afternoon Christmas day experimenting with making some of my own.

Handmade Pinheads

I tried a bunch of different designs and shapes, and discovered it was really hard to cut out such teeny shapes from brittle shrink plastic. My hands were hurting! It would have helped to have one of those neat shape punches for scrap booking to use. I also discovered that about 1/2" to 3/4" designs make the best pinheads - anything bigger makes a pinhead that is too large.

Handmade Pinheads

My favorites are the teeny scissors and hearts. I also got a craft store gift certificate in my stocking, and may just look around to see what kinds of shape punches are available, because these are just too cute AND kind of addicting!

Saturday, December 24, 2011

Little Things


I decided to make little things for gifts this year - stuff that is handy for a girl to throw in her purse or bag. I made a little recycled blank notebook, a pocket tissue holder and a coffee cup cozy for each of the gals on my list.


I used some recycled craft paper, printer paper and old maps to make these little blank books, cutting them to size with a dull rotary cutter and sewing up one side with my Bernina 350.


There are 16 blank pages in each little notebook to take notes!


And I blogged these little tissue holders here, they make excellent gifts!


There are lots of tutorials out there for coffee cup cozies, but I just traced one of the cardboard ones, made it a little wider, and added a more pointy end where it loops over the buttons. Cute!

I'm just stitching the last of the button stacks on the coffee cup cozies as I take a break to share this with you, and I've got to get them finished and wrapped for our Christmas party tonight! Hoping you are finishing up all of your last minute gifts, too. And a very merry Christmas to you all!

Friday, December 23, 2011

Thank You.

I've been reflecting over the past year - and actually farther back than that - and realized that I want to pause to say a few thank you's.


Thank you to all my friends and family who have supported us through our decision to move earlier this year. We couldn't have done it without the physical help you gave us to pack, move, and unpack, not to mention the loving way in which some of you have shared part of your home with us. I've moved so often in my life that you'd think I was collecting zip codes for a hobby, but I feel like I'm finally home in this neighborhood, and am so grateful that I cannot find words - other than to say, "Sweet home, Chicago." Thank you!


Thank you to everyone at the Chicago Modern Quilt Guild for welcoming me to the group. I have enjoyed every single meeting, seeing what you bring for show and tell, learning from all of you, getting inspired to try new quilty things, and finding new friendships. I am especially grateful for getting to know some of you better at the fall retreat (or Quilt Camp 2011), and look forward to getting to know more of you better in the coming months. Seriously - you guys are AWESOME and I am so glad to have found you! Thank you!


Thank you to all of you who visit me here and read my rambling blog. I just noticed that I started blogging about two years ago after my baby had her first birthday. (I totally suck at remembering anniversaries, I'll never get it together enough to have one of those "blogaversary" posts!) It sure doesn't seem like I've been at this for two years, does it? I really appreciate all of you who have taken a moment to leave me a comment or send me a message, from your genuine notes and messages of encouragement to those of you that just drop me a quick "Hello". I also love all of you that I've gotten to know better through blogging, and count you all as true friends. Thank you, thank you, thank you!

Thursday, December 22, 2011

A Christmas Countdown

My husband had a Christmas countdown calendar when he was a kid, and the family used it each year to countdown from the 1st of December until Christmas day. He wanted us all to work on one together this year, and we started at Thanksgiving. Funny, I thought we'd have it all stitched up in only one weekend! Wishful thinking. But, at least we finished it before Christmas.


I made the tree and my husband and tot made the ornaments. I still have to finish the very last ornament, a big star for the top of the tree. I'm making it with shrink-plastic and have all the supplies on the kitchen table to craft it up at naptime today.


We dedided to number the buttons the ornaments hang from instead of numbering the ornaments so that each year we can mix it up. And, I believe we might have to make at least one new ornament next year since these are a bit "fragile" (which is mom-speak for "poorly put together by my child").


Here we are, all caught up with our countdown! And my tot loves it, she's whizzing around the room with glee and you can barely see her to the side of the calendar!


I still want to hand-embroider some snowflakes around the tree, and I also really feel like some more big stitches are needed in between the different colors of the tree - but that will all have to wait until next year. I still have a small pile of hand stitched gifts to put finishing touches on and I've got to get stitching!

Monday, December 19, 2011

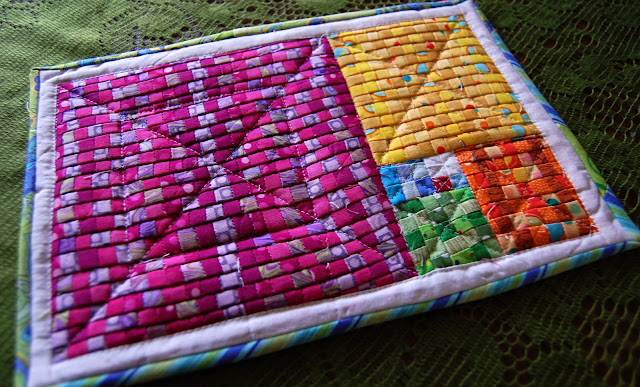
A Mathematical Mug Rug

Did you ever get an idea in your head that just drove you crazy until you could get it out of your system? Yeah. Well, this is one of those!


This little mug rug is made of squares (okay, wonky almost squares) based on a mathematical numbering sequence. I've had the idea for making a sample up like this to see what it would look like for awhile, and I have been working on in here-and-there for the past two weeks. Needles to say, the teeny piecing gave me a big appreciation for the importance of cutting and sewing precisely - mostly because I didn't, and the "squares" were a bit of a mess.


This is based on the Fibonacci numbering sequence (0, 1, 1, 2, 3, 5, 8, 13, 21, etc.) as represented by square tiles. When represented as tiles with the sides equal in length to successive Fibonacci numbers, you get a picture much like my mathematical mug rug (errr, only maybe a bit straighter). That little red square in the middle is the first number, followed by the turquoise square to the right of it, both representing 1's - then on to the white square of 2 units, the blue square of 3 units, the green square of 5 units - and on up until the big purple square of 21 units. The interesting thing to me is that the farther out you continue with the tiles representing Fibonacci numbers, the closer you get to a "golden rectangle" that Pythagoras discovered with the Golden Ratio. Which I'm also a little obsessed about...


Like I said, I really learned that little bitty piecing really relies on precise cutting and sewing, and if I am ever to do teeny piecing again I will definitely take my time and concentrate on being precise. I do like it, however, and am thinking about making something similar again soon. But, now that I've got THAT out of my system, I can go back to stitching up some last minute gifts!

Friday, December 9, 2011

A Litte Scrap Saving Tissue Holder


Pssst! I'm posting over at WeAllSew.com today sharing one of the little scrap saver sewing projects I'm stitching up for stocking stuffers this year!

Friday, December 2, 2011

Singer Hand Crank Custom

The Sews-it-all machine

The Sews-it-all sew anywhere machine is finally finished!

Singer 1901

I started this project over 6 years ago! This old 110 year old Singer had been left for dead and destined for the scrap heap after being discarded by the side of the road. When I took it in, the inner workings had rusted together from years of neglect, and the finish was bubbled, chipped, and totally destroyed.

Hand Crank custom Singer

With the help of Mr. Fixes-it-all, we took it apart, soaked it, stripped it, cleaned it, and oiled it so that it once again sewed. Then we did some body work, sanded it, added primer, sanded some more, added layers of paint, and then I finished it off with some detail painting of my own. The hardwood base is newly made, stained a deep red and finished with a durable clear coat.

Giant hand crank

This Singer 15-30 was originally a treadle machine. Since I already have three other treadle machines (that I never use) I decided that this needed to be transformed into a people-powered hand crank. Unfortunately, this Singer was not manufactured with a hole to accept a motor mount, which means that I don't have the option of attaching one of the new aftermarket hand-crank adapters. So, we got creative and made one from scratch. We toon an extra clutch nut and threaded it to accept two screws holding on a piece of flat-stock steele with a handle at one end. To get around the problem of turning the handle in the same direction that the clutch nut turns to loosen for winding a bobbin, we added one extra washer between the clutch nut and the original washer, and that allows me to tighten it enough that I can crank and sew away without spinning out the clutch.

Base handle

The other out of the ordinary modification we made was adding a handle on each side of the wooden base. I plan on carrying this out and about with me, and believe you me, these make it much easier to lug around than trying to grab the bottom of the base.


Oh, but the real test is how it sews, right? I just threaded this baby up, and did it CORRECTLY after taking this photo (I missed the spring on the side of the tension disks below the take up lever). In this machine the needle is set in "sideways" facing the left side.


Not bad for an old timer! Sews great! The only drawback is since the hand crank is attached directly to the machine, it takes one full turn to make one stitch. Which turns out to be a lot of turning to sew a seam! I finished this little holiday pocket tissue holder in just a few minutes, but I sure didn't want to turn the crank any more when I was done.


My plans for the Sews-it-all sew anywhere machine are to take it with me for events where electricity isn't available. It will be perfect for making fabric flowers from strips (plus I have a ruffler attachment for this machine, woo-hoo!), or sewing up a seam or two for any little craft project.

Phew! One project done, now on to the next one!