Hand Sewing: The Basic Stitches
Follow along with me to learn some basic hand stitches! Practice these stitches on your own, or make a small hand-stiched sampler with the instructions below.
If you are brand new to hand sewing, check out these links:
If you are brand new to hand sewing, check out these links:
Learn all about sewing needles here.
Find out all about sewing thread at this article from Annie's or this article from Phoebe Moon.
Find some hand sewing tips to help you get started here.
How to make a sampler:Find some hand sewing tips to help you get started here.
Materials:
- Size 10 Sharp sewing needle
- All-purpose sewing thread
- 100% cotton muslin fabric
- Iron and ironing board
- Fabric shears
- Thread snips
- Stitch Sampler template (download here)
- 12" ruler or straight edge
- Pencil or fabric marker
Use the Stitch Sampler template with a piece of cotton muslin cut 8 1/2" x 11". Grab a 12" ruler or straight edge and a pencil or fabric marker.
Place the 8 1/2" x 11" piece of muslin over the template; use the ruler and marking tool to trace lines #1, #2, and #3 onto the fabric as stitching guides.
Follow along with the template and stitch the samples as numbered below: stitch #1 goes on the line traced from the template for #1, stitch #2 goes on the line indicated for #2, and so on. After you have completed stitch #4, press each end of the fabric over following the instructions on the template to get ready for the hem stitches. Your finished stitch template will look similar to this (I'm holding it sideways):
The Basic Hand Stitches:
1. Basting stitch
The basting stitch is usually sewn with a single thread, and is used to hold pieces of fabric together temporarily until final sewing by hand or machine. Basting stitches can also be used to trace pattern markings onto fabric with thread, such as marking pocket placement or a hemline.
Tie a knot in the thread end, and take the needle in and out of the fabric to create stitches up to 3/8” apart from each other. The trick is not to leave the thread too loose or pull the thread too tight as you are sewing, the fabric should not buckle or pucker, but should lay flat. Secure the thread at the end of the row of stitches.
2. Running stitch
The running stitch is a small stitch, usually sewn with a single thread for securing two pieces of fabric together in a plain seam. You can use the running stitch sewn with double thread knotted securely at the end to pull fabric into gathers.
Take several running stitches with your needle at once before pulling the thread through to make stitching go faster!
The fabric should not buckle or pucker, but should lay flat. Secure the thread at the end of the row of stitches.
3. Back stitch
The back stitch is usually sewn with a single thread and creates a strong, secure seam. The front of the stitch should lie in a neat row, and the back will look like longer overlapping stitches.
The back of the Back Stitch, showing overlapping of the stitches.
Use a single thread knotted at the end. Begin by taking one stitch in and out of the fabric. Set the needle back into the fabric one small stitch BEHIND where the needle came out for the last stitch, and bring the needle out one stitch AHEAD of the last stitch. The stitching should appear even, and should not pull or pucker the fabric but should lay flat. Secure the thread at the end of the row of stitches.
4. Overcast stitch
The overcast stitch uses a single layer of thread and can be used to finish the raw edges of a seam.
Use a single thread knotted at the end. Begin stitching from the back of the fabric, bringing the needle through to the front, and then over the fabric to stitch through the back to the front again. Don’t pull the stitches too tight, the stitching should appear even and should lay flat. Secure the thread at the end of the row of stitches.
The Hem Stitches
A quick word about hemming stitches. I learned to sew these stitches as the others, from right to left. Some people prefer to sew hem stitches in the opposite direction (from left to right instead of right to left) so that the threads “cross over” each other. I've found Sewing Instructors and reference books showing either way. So, both ways will work, it’s all a matter of preference!
5. Hem stitch
The hem stitch uses a single layer of thread and is a quick and easy way to stitch a hem.
Use a single thread knotted at the end. Begin stitching up through the folded fabric of the hem. Take the next stitch to the left, picking up a few threads of the main fabric.
Again, take a stitch to the left through a few threads of the folded hem, and repeat. The hem should lie flat.
Secure the thread at the end of the row of stitches.
6. Blind hem stitch
Similar to the hem stitch but sewn in a way that the stitch is nearly invisible.
Use a single thread knotted at the end. Begin stitching up through the folded fabric of the hem. Take the next stitch to the left, picking up only one or two threads of the main fabric. Then move the needle to the left and below through the folded hem, and repeat.
Use a single thread knotted at the end. Begin stitching up through the folded fabric of the hem. Take the next stitch to the left, picking up only one or two threads of the main fabric. Then move the needle to the left and below through the folded hem, and repeat.
Be careful not to pull the stitches too tight, the hem should lie nice and flat. Secure the thread at the end of the row of stitches.
Even though the stitches are made with red thread, it is still very hard to see the stitches from the other side of the fabric.
Once you have a handle on these few basic stitches, you can tackle any simple sewing project! Here are a few ideas:
Sew an apron - check out this free pattern and tutorial to make a simple kitchen apron from just one yard of fabric One Yard Use-It-All Apron.
Stitch up a simple pillowcase - get the free instructions here to make a Super Simple Pillowcase.
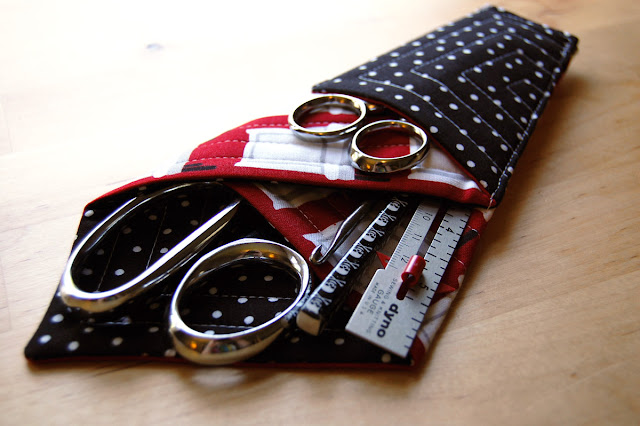
Visit my FREE CRAFT PROJECTS page to find small crafts like a scissors case, craft caddy, fabric pint basket, pincushions, and more.
And please let me know if you have any great hand sewing tips or tricks to share!


Comments
Thanks Sofia
www.lovalafashion.blogspot.com.au
It is now at https://phoebemoon.com/tutorials/thread-theory.htm .
Can you change that? Thanks!